Tips for Indoor Drumline – Warming Up Outside

Since it has been a few years since IPA State Finals has taken place at the Hulman Center in Terre Haute, we thought we would re-post this past article originally written by Jeff Huffman.

This weekend is the Finals for the IPA (Indiana Percussion Association) circuit will require an outside warm-up. Those groups who have performed in Dayton for WGI Championships or participate in circuits in warmer regions of the country know this is a normal process. The outside extended warm-up can be very beneficial to preparing for the large arena environment. But for those who have not gone through that process before, here are some tips to make sure the experience is smooth and beneficial for everyone.

  • KEEP A VERY CLOSE EYE ON THE WEATHER. Be prepared for cold, rain, wind and heat.
  • Take jackets and coats to warm-up. Have a parent push around a large plastic trash can for the kids to ditch their jackets as they enter the arena. They might not need them, but it’s better to be prepared. Standing in a parking lot freezing before your final performance isn’t going to help you have a relaxed, confident performance.
  • Be prepared to change on the bus. If you aren’t showing up in uniform, don’t plan to go inside to change. This may be a possibility, but it is usually much easier and quicker to take turns changing on the bus.
  • Have plenty of plastic tarps. We all hope for perfect weather conditions on contest days, especially when the warm-up is outside, but that isn’t always the case and it’s best to prepare for inclement weather. Don’t just bring a couple huge tarps to park the equipment under. Bring smaller tarps that can stay over the electronics carts while rolling from warm-up to the arena.
  • Have plenty of bungee cords. You’ll need those tarps strapped down if it’s windy!
  • If it looks to be sunny and warm, make sure to bring water. An hour in the sun, on asphalt, can wear the students down quickly.
  • If having your electronics on during warm-up is important to you, TAKE A GENERATOR. There might be power available in the warm-up lot, but don’t plan for it.
  • Keep electronics dry at all costs!
  • Be aware of the Inclement Weather/Tent Schedule and use your time in the tent if you have any concerns about the weather. This includes very cold and/or windy conditions.
  • Finally, directors and staff – Since this is only the time for everyone at this venue, get there early and take the time to walk the flow in and out of the arena so you’re familiar with it. Also, allow enough time for your student performers to go in and watch a couple groups so they can get the feel for the arena, along with the on-and-off-the-floor flow.

Good luck to everyone performing in the IPA State Championships this weekend!

Concert Snare Drum Maintenance: Common Issues

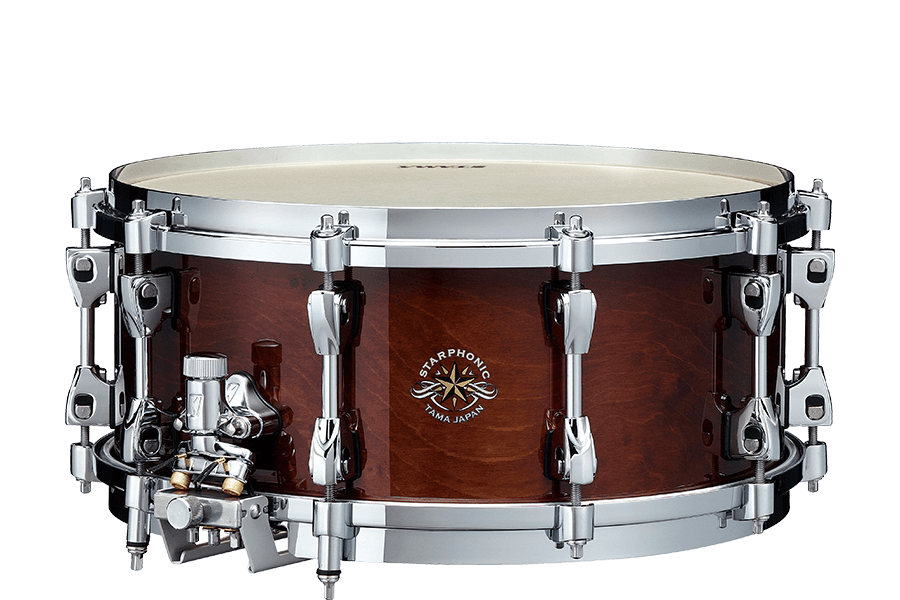
With concert season in full swing, we thought this would be a quick reminder on things you can check out on your snare drum if you are having issues. There are some common maintenance issues that will arise over time with relation to your concert snare drum. While most of these are fairly simple we have tried to highlight issues that can be taken care of by you with little knowledge of percussion repair.

Cleaning: Wipe down each drum with a soft cloth, including the hardware and the shell. If there is extreme dirt or grime, you can use denatured alcohol diluted in water. If you have anything that is extremely sticky use a small amount of valve oil. In both cases, put the product on the cloth instead of spraying directly on the drum.

Parts Inspection: Do a visual inspection for any missing or broken parts that may need replaced. Some common parts missing or broken include the following:

  • Bent Tension Rods
  • Damaged Tension Posts or Tubes
  • Bent Strainer from overtightening snare strands
  • Bent or out of Round Rims
  • Inspect the bearing edges when heads are off for any damage

Head Replacement: Changing the heads on a concert snare drum that is used regularly should happen about once a year. Over time the head will get stretched so far that it will not hold tuning for long even if tuned daily. If the head is dented, ripped, or severely scratched consider replacing the heads. While changing a drum head is a fairly easy task, when you have to do it quickly and on your own there are a few things to consider.

  • Use two drum keys in a cross pattern to quickly remove the head.
  • Keep the tension rods attached to the rim.
  • Quickly remove any debris from the rim.
  • Take your time to make sure the head is seated properly on the bearing edge.
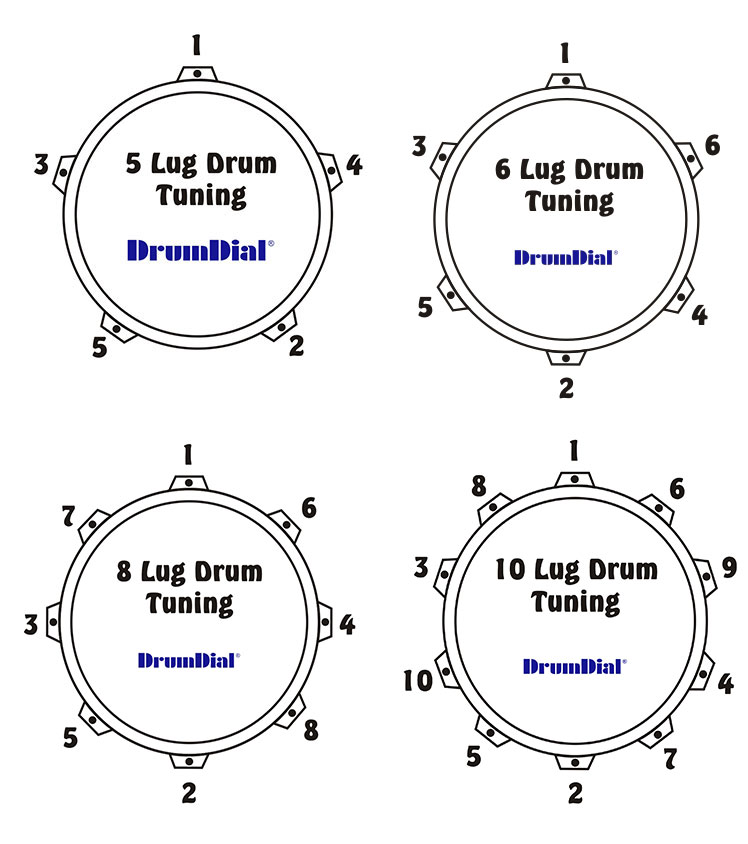
  • Finger tighten in a cross pattern and then using a drum key in the cross pattern.
  • Placing a finger in the center of the head can help you determine when the head is ready to tune.

Snare Strand (Wires) Detach: A common issue on a snare drum is for the snare strand to become detached or become loose even with the strainer working properly.

  • Remove any old string or nylon strip and attach new ones.
  • Let some tension out of the strainer knob to allow for adjusting later on.
  • Attach the butt-side first being sure to center the strands from side to side.
  • Attach the throw-off side with it in the “ON” position. Make sure it is tight but leave some room for adjustment.

Damaged or Bent Shell: Inspect the shell for and damage. Metallic shells with dents can often be put back into round by a repair technician.

If you continue to find issue with the way your concert snare drum is performing or sounding after going through these common tips, feel free to give us a call and we talk help diagnose the problem.

Upgrade Your Instrument Today!

Hello! My name is Brian Travelsted, and I am the Percussion Specialist at Chops Percussion. Chops is the drum and percussion division of Paige’s Music. If you’re still renting your child’s beginning percussion kit from Paige’s and it’s no longer being used, I want to let you know about our upgrade rent-to-own options.

To see what we have to offer, please visit this link: https://www.chopspercussion.com/run?useUX=true&id=8&opid=712&_tid=475  here you will find all of your upgrade options, along with pictures and pricing information. You can also apply up to 18 months of your payments on your current instrument towards your new rental, which can lower your monthly payment!

If your child is showing a high level of commitment to percussion, now is the time to upgrade their instrument and take their playing to the next level. Please call 317-813-2070 or email sales@chopspercussion.com for more information. We look forward to helping the percussionist in your home get an instrument they’ll love playing for years to come!

Drum Brush Comparison and Recommendations

We often get questions about the best type of drum brushes for certain musical applications and with it being jazz/concert season, I thought I would take a little time today to explain the different qualities of drum brushes and offer a few recommendations as well. While there are many different types, most drum brushes differ in three main ways: brush material, handle material and retractability. We will take a look a each category and then offer some good options depending on the musical setting.

Brush Material

While most brushes are made of wire materials, the use of nylon wires has becomes more and more popular as they offer a different sound. Wire brushes tend to have a snappy sound with a crisp, bright sound quality when striking the heads. They also offer the best option if doing a lot of sweeping/swishing while playing. There are different weights of metal wires that can be used to give the player even more control of their sound. Vic Firth even makes some wire brushes such as the Steve Gadd brushes or Live Wire Brushes that offer different tips to each metal wire for an even fuller sound .

Nylon or plastic wires offer a much duller and darker sound when struck or swept across the head. These are great for playing in small combos or small spaces where you need the perfect amount of blend between the drummer and the band.

Handle Material

While the handle of the brush will not really change the sound of the wires they do offer distinct differences in how a drummer might approach a particular sound. The most common types of handles would be either wood, plastic or rubber. The wood handles give the most similar feel to a stick, while something like the rubber would be a great option if you are playing some fast music where that little extra bit of grip might be important. When it comes to the grip, this is really a personal decision.

Retractable/Fixed

The last common trait for drum brushes would be whether or not you can retract the wires into the handle or not. The main advantage to the retractable style brush is that you can almost fine tune the amount of brush sound that you get when striking the drum. The other great advantage is that when not in use you can quickly retract the wires and keep from getting damaged in the bag. Fixed brushes are great if you like the feel of a wooden handle and these are often times used more on brushes that have thicker metal/nylon wires.

Recommendations

Overall Use: Vic Firth Jazz Brush – This is a great set of brushes that offers a good medium weight set of wires with a very durable plastic handle.

https://www.chopspercussion.com/product?item=7005608

Concert Application: Innovative Percussion BR-3 – These medium nylon brushes with a fixed wooden handle offer a consistent feel and sound for concert music.

https://www.chopspercussion.com/product?item=7019786

Jazz: Vic Firth Heritage Brushes – A retractable wire brush featuring light gauge wire and a smooth rubber handle. Fast and easy to play.

https://www.chopspercussion.com/product?item=7015066

There are certainly many other great options out there for drum brushes but hopefully having a little more information about the differences between them can help you find something that will work just right for you. Of course, feel free to call us anytime if you are looking for a specific sound and we can help you out!

FAQ – “How do I tune my drums?”

“So….. how do we tune the drums once we get them set up?” That is one of the FAQ’s we get when someone buys a drum set for the first time. There are many different ways to tune your drums; just look at all of the tuning articles and videos on the internet! We’re going to try and simplify this process for you with the video links and PDF below. Learning to tune drums is a huge part of playing them, so be sure to pay attention to what you see/read (thanks to Evans Drumheads and Drumeo for the great info). You also need to practice and experiment with tuning so that you can find the sound that suits YOU the best. Let us know if anything you see or read doesn’t quite make sense; we’d be glad to help you out!

 Evans Drumheads Tuning Tips


Drumeo Tuning Videos

Tuning Your Toms


Tuning Your Bass Drum


Tuning Your Snare Drum