Percussion Storage Solutions for the New Year
As the new year gets underway we thought it would be a great idea to go over some easy storage solutions that you can use for your percussion gear to help keep things protected and organized. While there are some solutions that can hold multiple different types of items, we thought we would focus on the best ways to store accessories, hardware, and drum sets. Below we have listed a few great options for each type of storage solution you may be looking for.
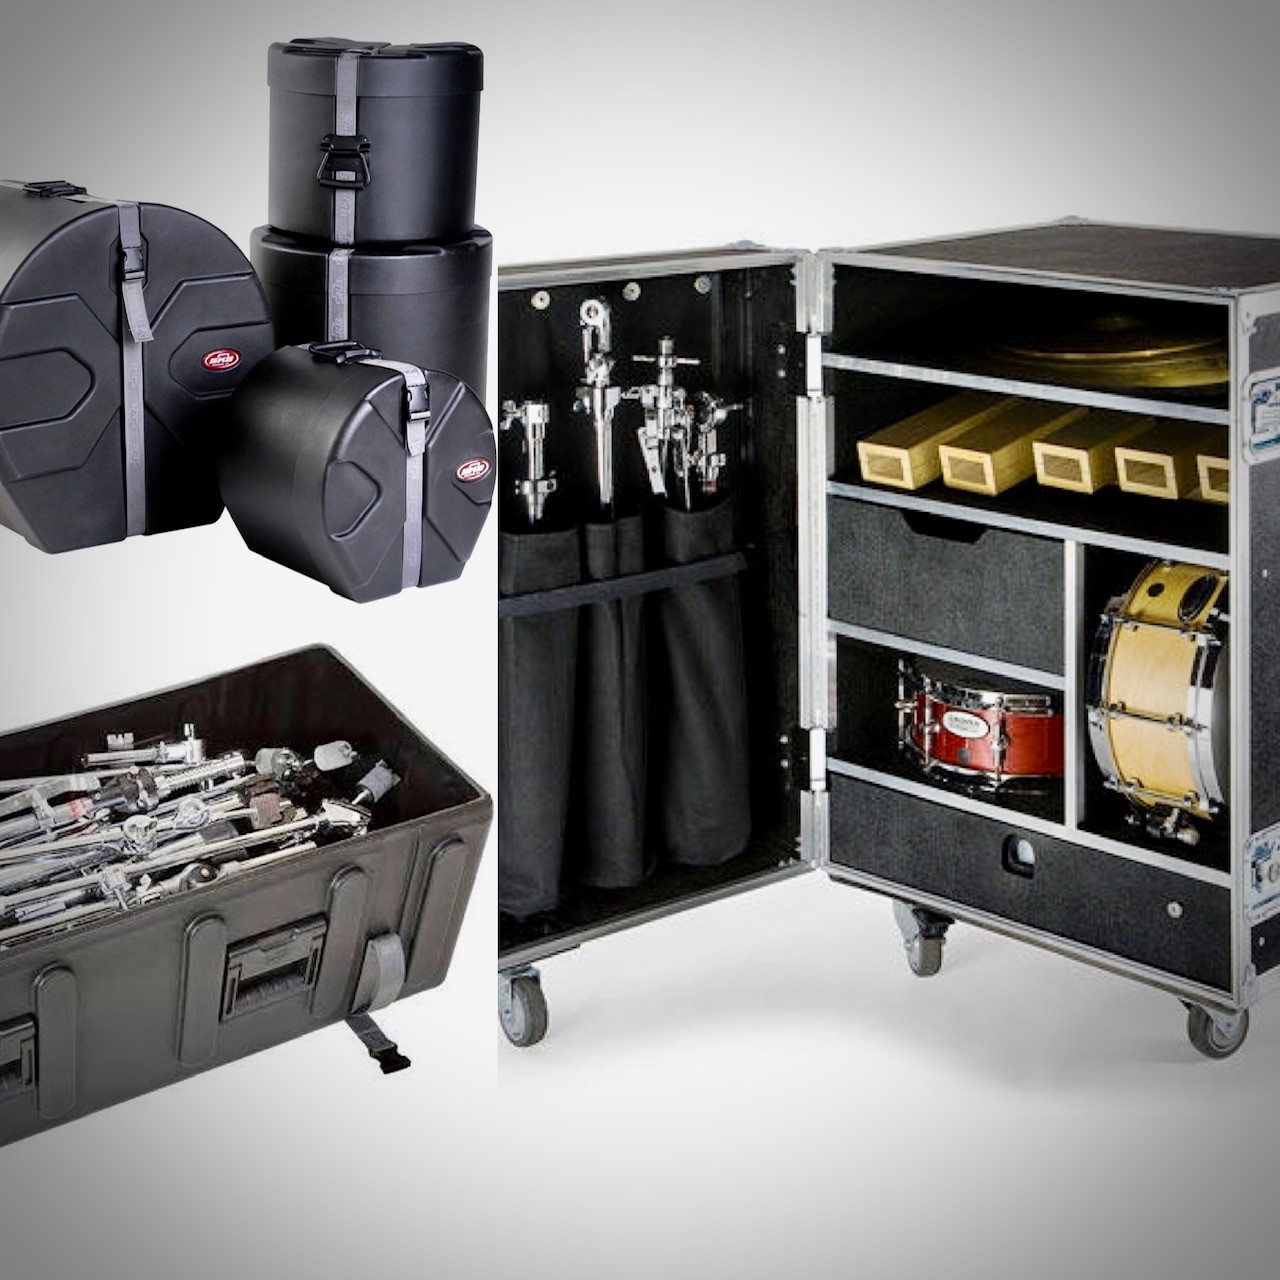
Hardware and Cymbals
These are often stored separately and while the obvious choice for cymbals might be a cymbal bag, depending on how often you use them you may want to consider a more durable and long-term storage solution.
- SKB Large Hardware Case with Wheels (1SKB-DH4216W) – Great for storing large amounts of cymbals stands, snare stands, etc.
- Humes & Berg Trap Case with Wheels (DR550XABK) – Great for moving hardware and small accessories to various performance venues
- Humes & Berg 22″ Enduro Cymbal Case with Wheels (DR526ZBKSP) – Great storage solution for drum set cymbals on the move
- SKB Trap Case with Cymbal Vault (1SKB-TPX2) – Great all in one store for drum set hardware and cymbals. Execllent for keeping all those items together at the end of a rehearsal or performance.
Drum Set Storage
While some schools have the luxury of keeping a drum set together at all times, many schools need a way to safely store drums at the end of the school day or rehearsal. Cases like the ones below are great as they offer protection but also stack well on each other to allow you to maximize storage space.
- Humes & Berg Enduro or Enduro Pro – These also come available with or without foam inside.
- SKB Hard Cases – There are many option here in all sizes that will protect your drums.
- Gator Protechter Cases – Good all around solution and sold in sets as well depending on the size of your drums.
Concert Accessory Storage
The last set of storage solutions would be for all your small accessories, concert snare drums, concert mallets, and much more. These all in one solutions can even double as a trap table if need, although we feel it best to use as storage solutions only.
- Grover Percussion Cabinet – Good compact solution, that can store a ton of percussion accessories!
- Columbus Percussion Percussion Cabinet – This is one of the nicer looking cabinets on the market today. Hand made quality with carpeted exterior and interior. The drawers are equipped with self-closing features and you can customize some of the shelving to fit your needs. This one comes highly recommended for the serious program!
If you want pricing or would like more details on any of the storage solutions mentioned above, feel free to give us a call at (317) 813-2070 or send an email to chops@chopspercussion.com.